It's almost time again for Pi Day (14th March), an annual celebration of the mathematical constant π (pi). We love any excuse for celebrating maths, and this year we've been getting creative with some fun Pi skyline art!
It's really easy to make your own - watch our video for a quick overview, then scroll down for the full step bested instructions and a free downloadable template.
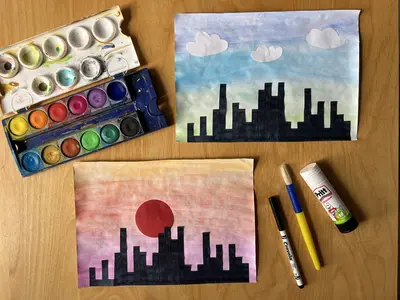
You will need:
Graph paper or a copy of our template
Colouring pencils or pens
A4 white paper
Water colour paints and a paintbrush
Scissors
Glue
Optional: If you want to add some extra details to your picture, you will also need some extra paper to cut out shapes e.g. white paper for clouds, orange or red paper for a sunset.
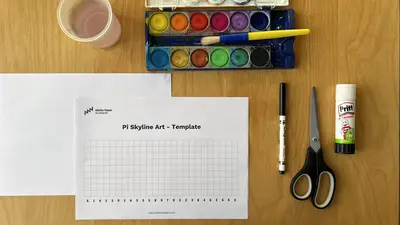
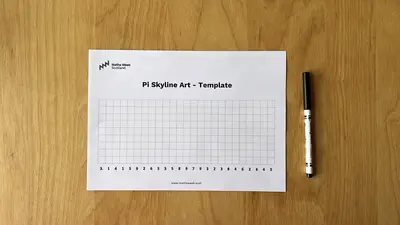
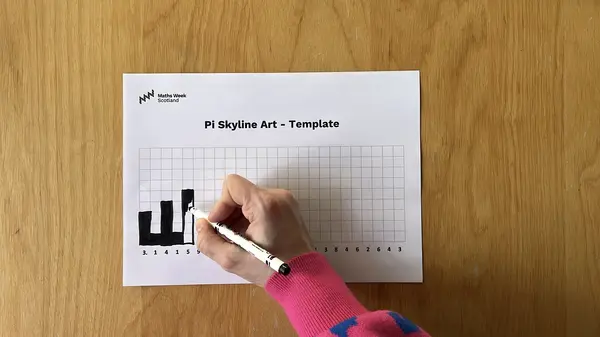
Step 1: Either print off our template below, or if you have A4 graph paper already you can use that instead (a grid with approx. 1cm squares works well).
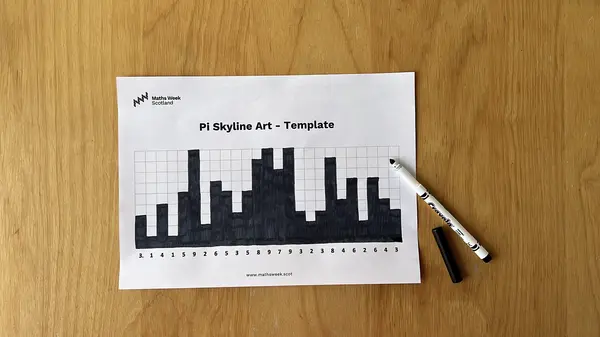
Step 2: If you are using the template, for each column colour in the number of squares corresponding to the digit of Pi below. If you are using your own graph paper, use the paper in landscape format. You will need to write out the digits of Pi along the bottom of the paper yourself, one digit per square. If doing this activity in class, you could put the digits up on the whiteboard for everyone to copy.
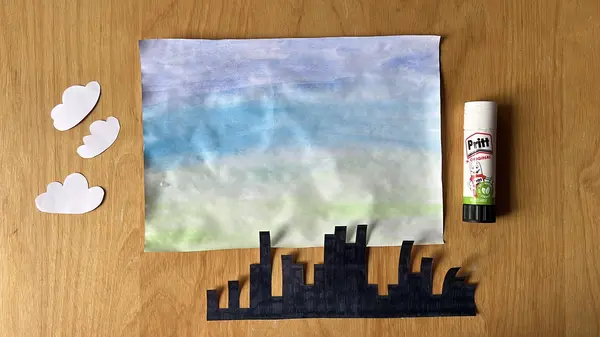
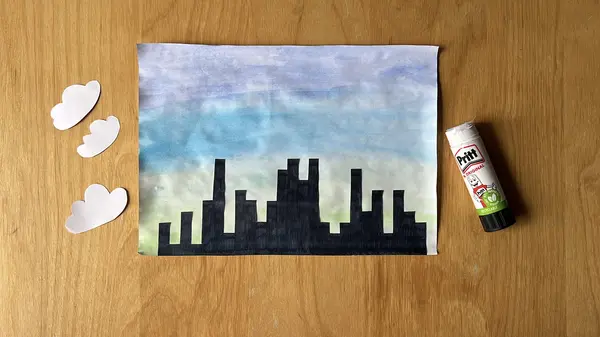
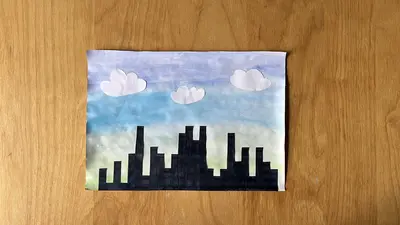
We coloured our columns all in black, to create a silhouette skyline, but you could use other colours if you wanted to or even a different colour for each column.
The first 50 digits of pi are: 3.1415926535897932384626433832795028841971693993751...
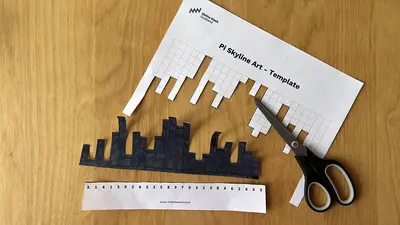
Step 3: Cut out your 'skyline' all in one piece, and set aside.
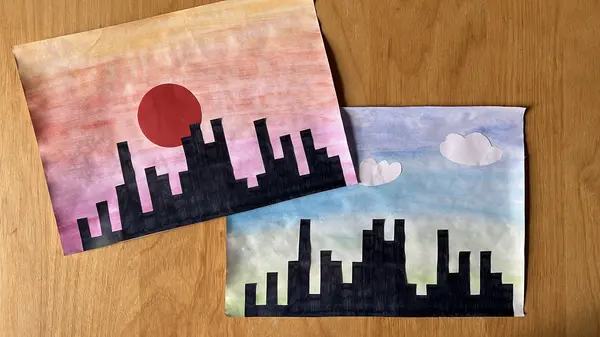
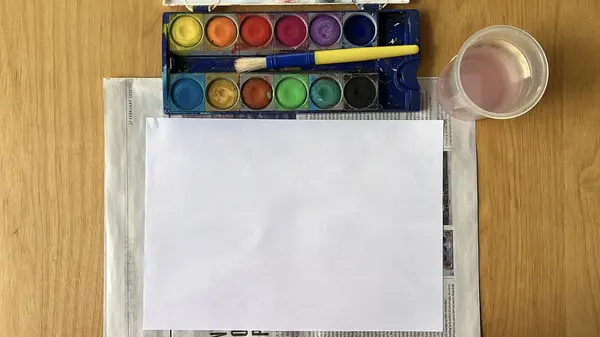
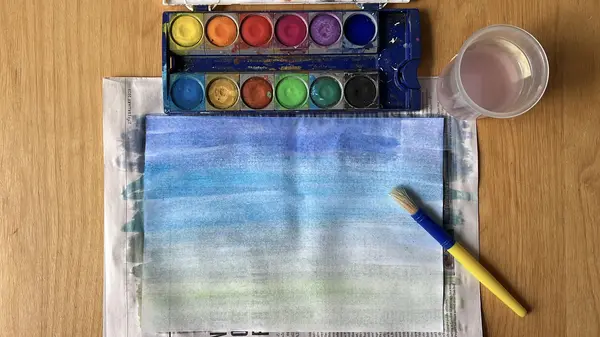
Step 4: Take a white sheet of A4 paper and lay it down in landscape format. You might want to putdown some newspaper to protect your table. With the watercolour paints, paint bands of different colours across your sheet of paper - the wet water colours will blend together to create an ombré effect. In our video, we used greens and blues to create a day time sky. In another example we prepared earlier (see below) we used red, orange and yellow to create a sunset sky.
You can also try experimenting with different colours, but when blending colours together remember to use colours that are next to each other on the colour spectrum (red - orange - yellow - green - blue - purple) otherwise you might end up with a brown background!
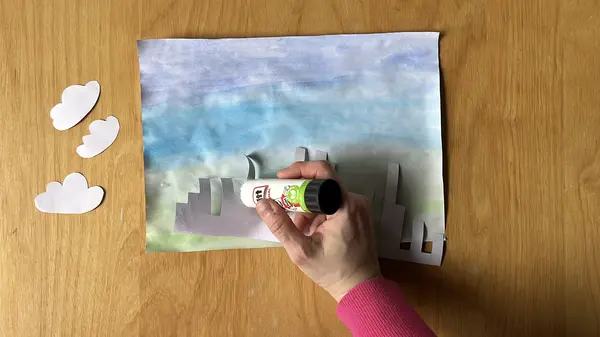
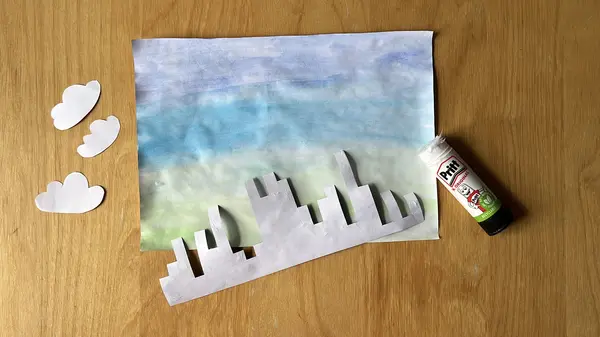
Step 5: After your water colours have dried, glue your cut out Pi skyline on to your painted background.
Step 6: If you want to, you can add some extra details by cutting out paper shapes and adding gluing them on to your picture. For our blue-green sky, we added some white clouds. For our orange-red sky, we added a big red sun. NOTE: If you want to have your sun setting behind the skylines like in our example, you need to stick it down before you stick down the top of the skyline!
What other details can you think of to add to your Pi skyline picture?
We love seeing your Maths Week Scotland creations, so if you make your own Pi Skyline artwork, be sure to share some pictures with us! You can post them on Facebook or Bluesky and tag us in or use the hashtag #MathsWeekScot.
Responsibility for the Maths Week Scotland programme is moving to Education Scotland. Planning is underway for the tenth anniversary of the programme. Further information will be available from Education Scotland soon.