Best suited for: Second Level and above / Age 8-11, 12-15, 16+
Maths involved: geometry, angles, symmetry
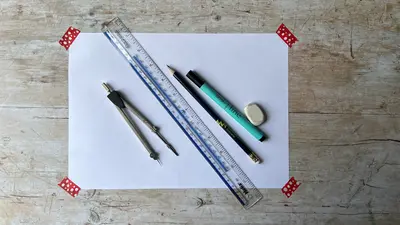
Materials needed:
Sheet of A4 paper
Compass drawing tool
Ruler
Pencil
Pen (optional)
Eraser (optional)
In this tutorial, we will show you how to draw a perfect 5-point star. It’s easier than it may look at first glance, but it’s quite difficult to explain in words what to do, so we have included step-by-step photos.
Instructions
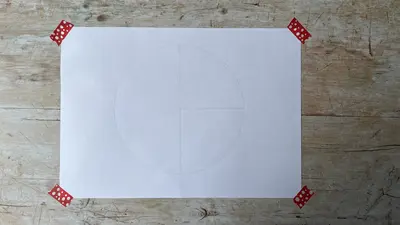
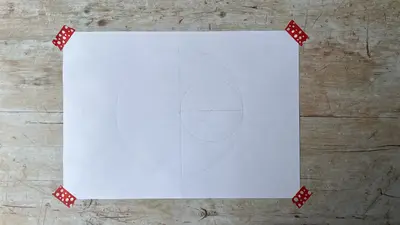
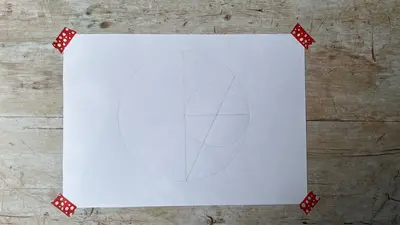
Step 1: Set your compass to 8 cm and on your piece of paper, draw a circle with a radius of 8 cm.
Step 2: Using the ruler as a guide, draw in the diameter of the circle with the pencil, i.e. a line from one edge of the circle to the other going right through the middle point.
Step 3: In a right angle to the line of the diameter, draw in the radius, i.e. a line from the middle of the circle to the edge. Mark the mid-way point on the radius line.
Step 4: Adjust your compass to 4cm, set the point of your compass on the mid-way mark of the radius line and draw a circle around the line.
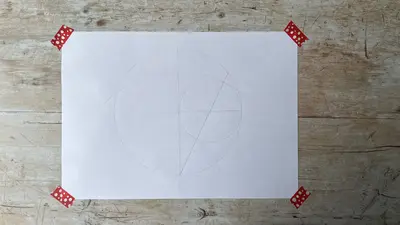
Step 5: Take your ruler, and draw a new line, starting from where the diameter line meets the bottom edge of the large circle, going through the middle point of the smaller circle, and finishing when you meet the edge of the large circle again.
Step 6: Using the compass, place the point of the compass where the diameter line meets the bottom edge of the large circle. Set the compass to the width between that point and where the line you drew in Step 5 meets the near side of the smaller circle. Draw a semi-circle that cuts across the edges of the large circle on both sides.
Step 7: One last job for the compass – this time we are placing the point of the compass in the same spot as in Step 6, but adjusting the width to where the line you drew in Step 5 meets the far side of the smaller circle. Draw a semi-circle that cuts across the edges of the large circle on both sides.
Step 8: Using the pen, connect the four points where the semi-circles cut across the edges of the large circle, and the fifth point at the top of the circle where the diameter line meets the edge of the large circle, to create the five point star (as shown below).
Once the ink of the pen has dried, you can erase the pencil lines to be left with just the star!
Responsibility for the Maths Week Scotland programme is moving to Education Scotland. Planning is underway for the tenth anniversary of the programme. Further information will be available from Education Scotland soon.